There is a reason chimichangas show up on nearly every Tex-Mex menu worth revisiting, and it comes down to that first bite. A crispy, golden tortilla shatters slightly under a fork, giving way to warm seasoned beef and pockets of melted cheese underneath. This homemade version brings that same restaurant favorite to your own kitchen, and the best part is you get to choose exactly how crispy you want it, whether that means the classic fried crunch or a lighter, oven baked version that still delivers on flavor.
What makes this beef and cheese chimichangas recipe such a reliable dinner option is how forgiving and adaptable it is. The filling comes together with pantry staples in under fifteen minutes, and from there you can load these up with beans, extra spice, or whatever toppings your family loves. They freeze beautifully too, which means one cooking session can set you up with an easy, comforting dinner for weeks to come.
Why This Recipe Belongs in Your Dinner Rotation
Chimichangas earned their spot as a Tex-Mex classic because they deliver big, satisfying flavor without demanding much technique. The tortilla itself does the heavy lifting once it hits hot oil or a hot oven, transforming from a soft wrap into a genuinely crispy shell that holds its shape through the whole meal. Underneath that shell, a well seasoned beef filling and plenty of melted cheese keep every bite rich and comforting.
Also Read: Smash Burger Recipe: Crispy, Juicy Restaurant Style Burgers
Also Read: Easy One-Pan Chicken Fajitas Recipe (Quick & Flavorful)
This recipe also solves a common weeknight dilemma, since it gives you full control over how indulgent or how light you want dinner to be. Frying delivers that unmistakable restaurant style crunch, while baking cuts back on oil without sacrificing much of that crispy exterior. Either way, you end up with a meal that tastes like it came from a Tex-Mex kitchen rather than your own stovetop.
Ingredients You Will Need
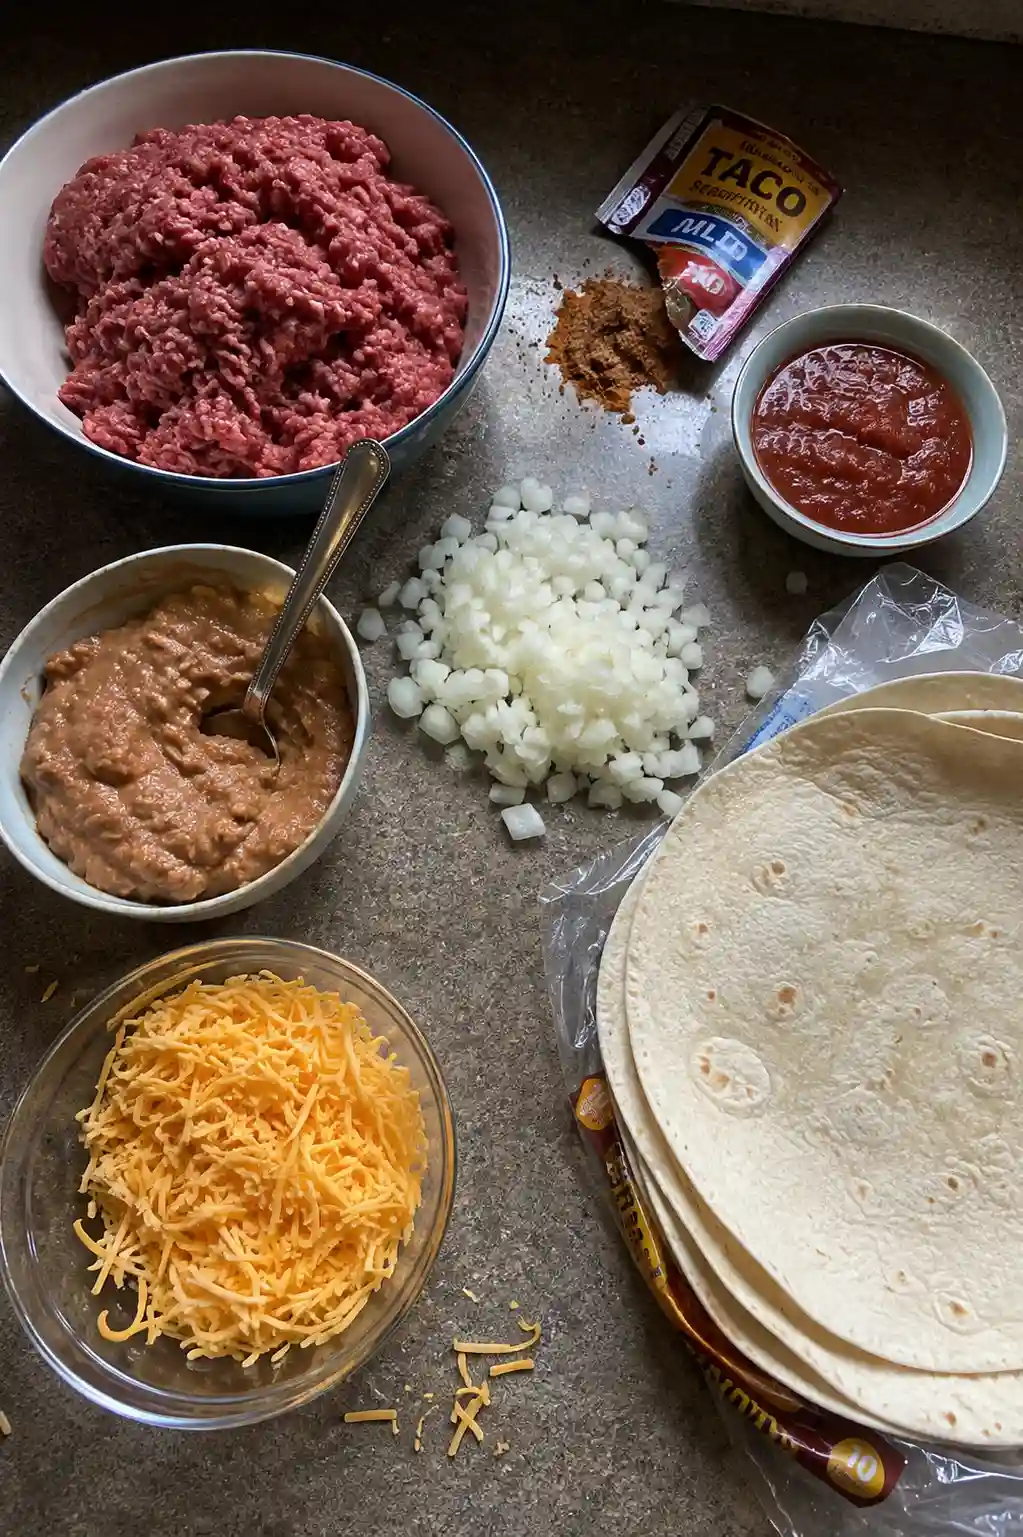
This recipe uses simple, easy to find ingredients, most of which are already sitting in a well stocked pantry and refrigerator.
For the Filling
Lean ground beef forms the base, cooked down with finely diced onion and minced garlic for depth. A packet of taco seasoning, or a homemade blend of chili powder, cumin, paprika, and garlic powder, brings that unmistakable Tex-Mex flavor, while a scoop of salsa keeps the filling moist and helps everything bind together as it simmers.
For Assembly
Large burrito size flour tortillas hold everything together, and warming them slightly before rolling helps prevent any cracking or splitting. A layer of refried beans adds creaminess to the filling, and a generous handful of shredded cheddar or Mexican blend cheese melts beautifully once the chimichangas are cooked.
For Cooking
A neutral oil like vegetable or canola works well whether you are frying or brushing the tortillas lightly before baking.
How to Make Beef and Cheese Chimichangas Step by Step
This recipe comes together in three simple stages, and once the filling is ready, assembly moves quickly.
Step One Cook the Beef Filling
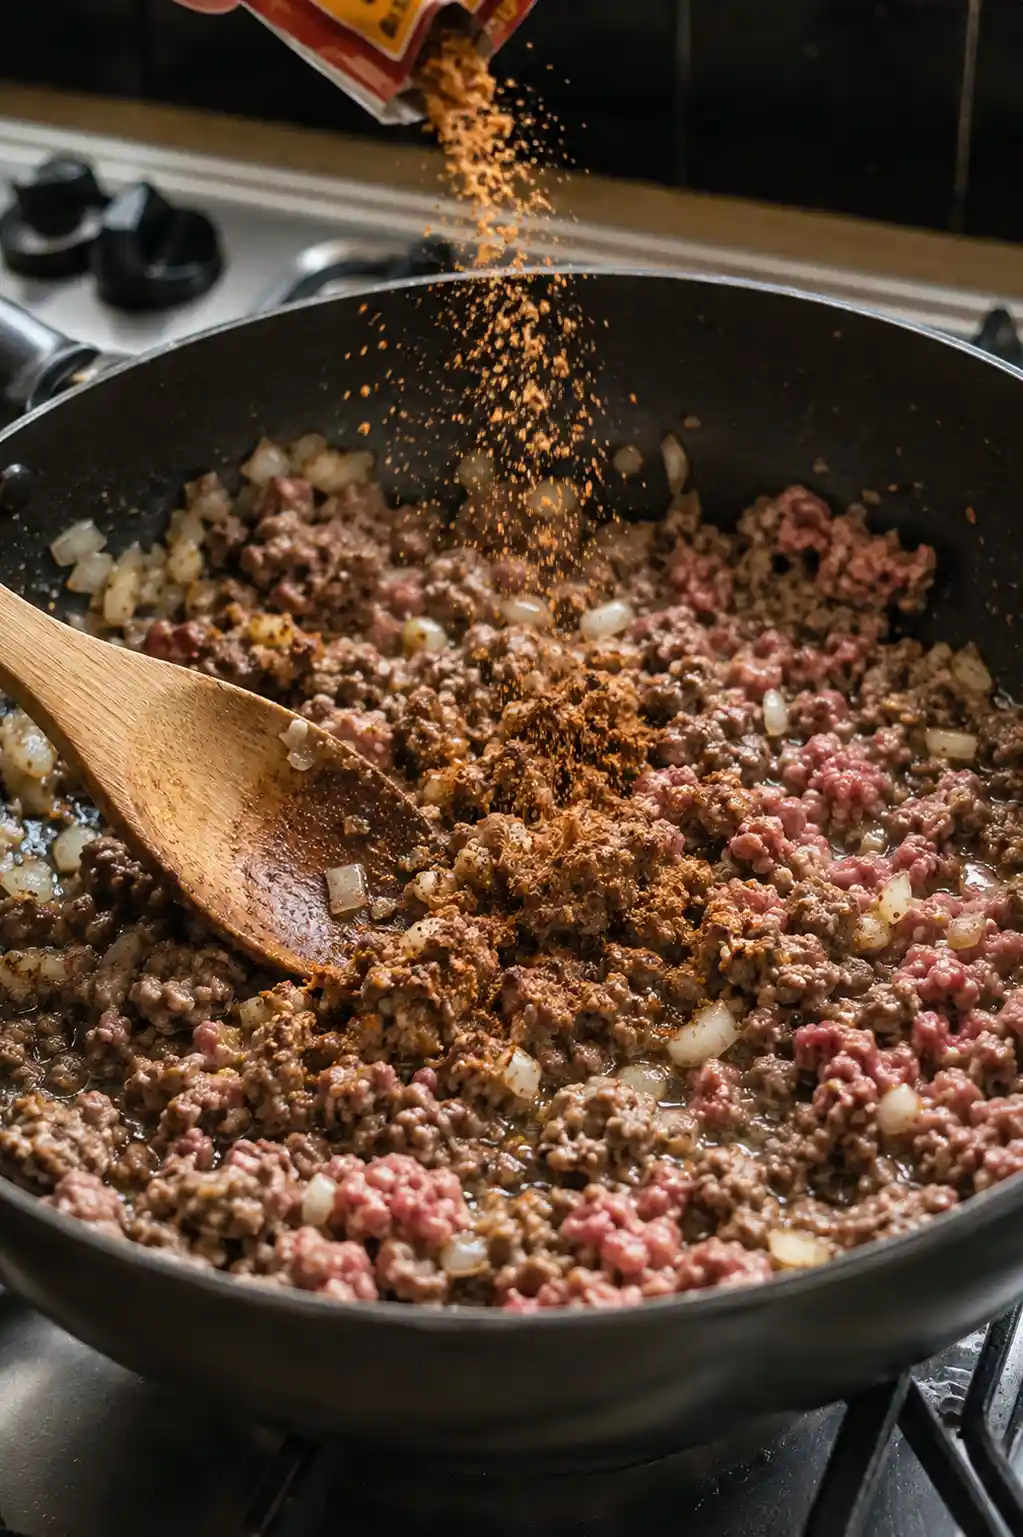
In a large skillet over medium heat, cook the ground beef and diced onion together until the meat is browned and the onion turns tender, about six to eight minutes. Drain any excess grease, then stir in the garlic, taco seasoning, and salsa. Let everything simmer for three to four minutes, until the mixture thickens slightly and the flavors meld together.
Step Two Assemble the Chimichangas
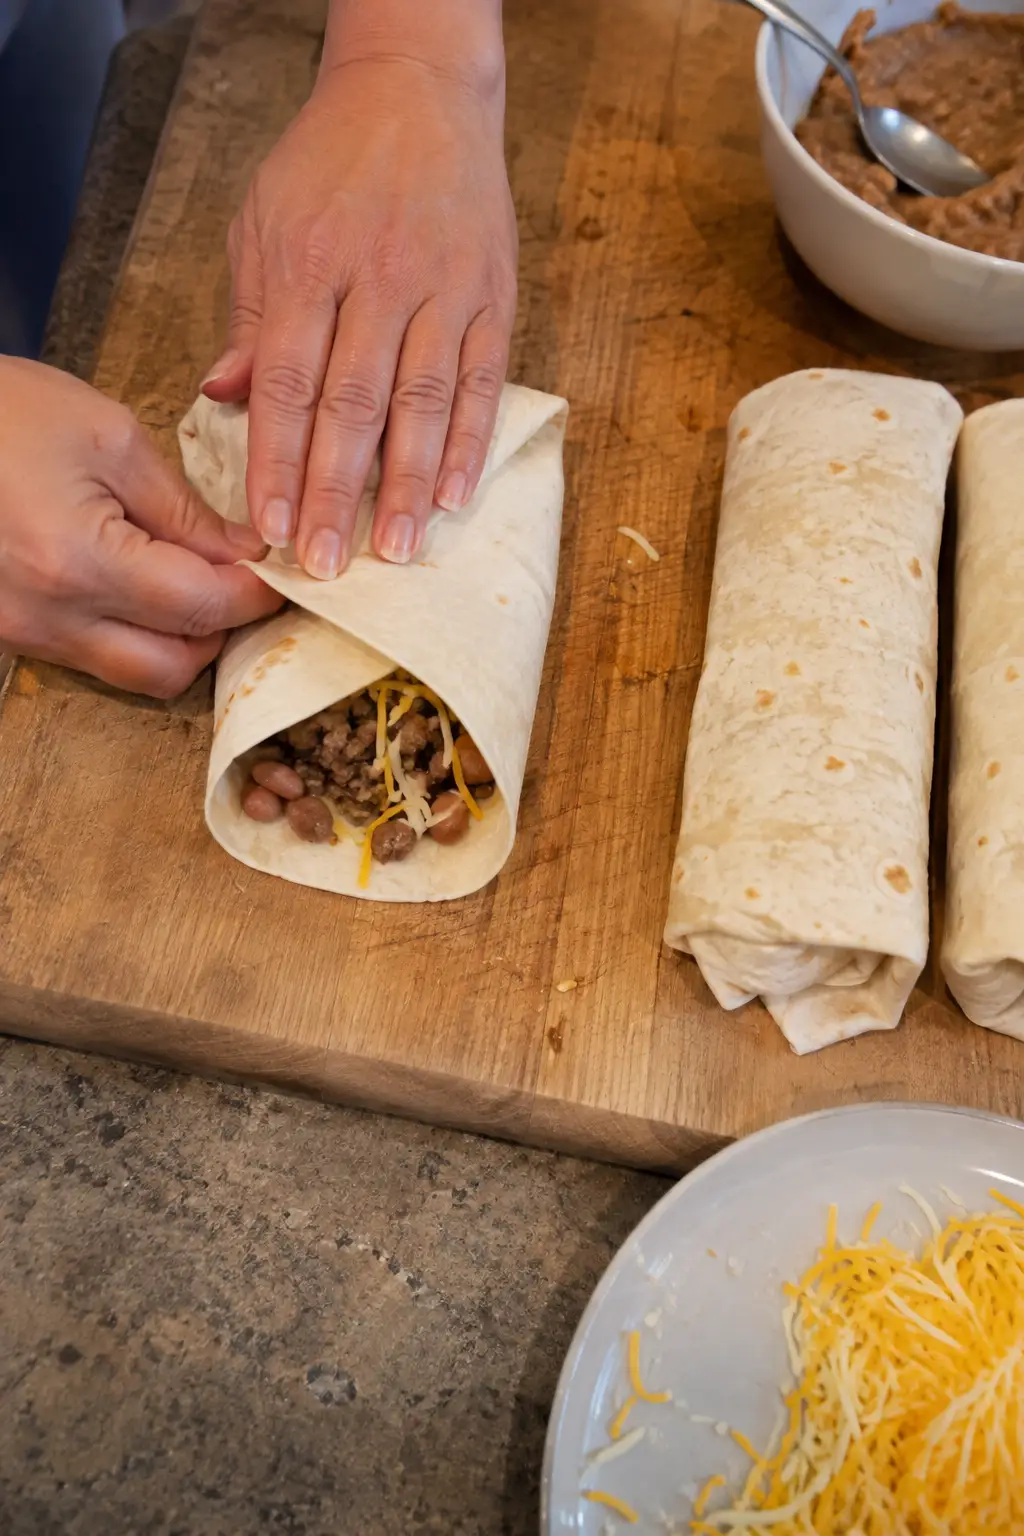
Spread a spoonful of refried beans down the center of each warm tortilla. Top with a generous scoop of the beef mixture and a handful of shredded cheese. Fold in the sides of the tortilla, then roll it up tightly like a burrito, making sure the seam stays tucked underneath.
Step Three Choose Your Cooking Method
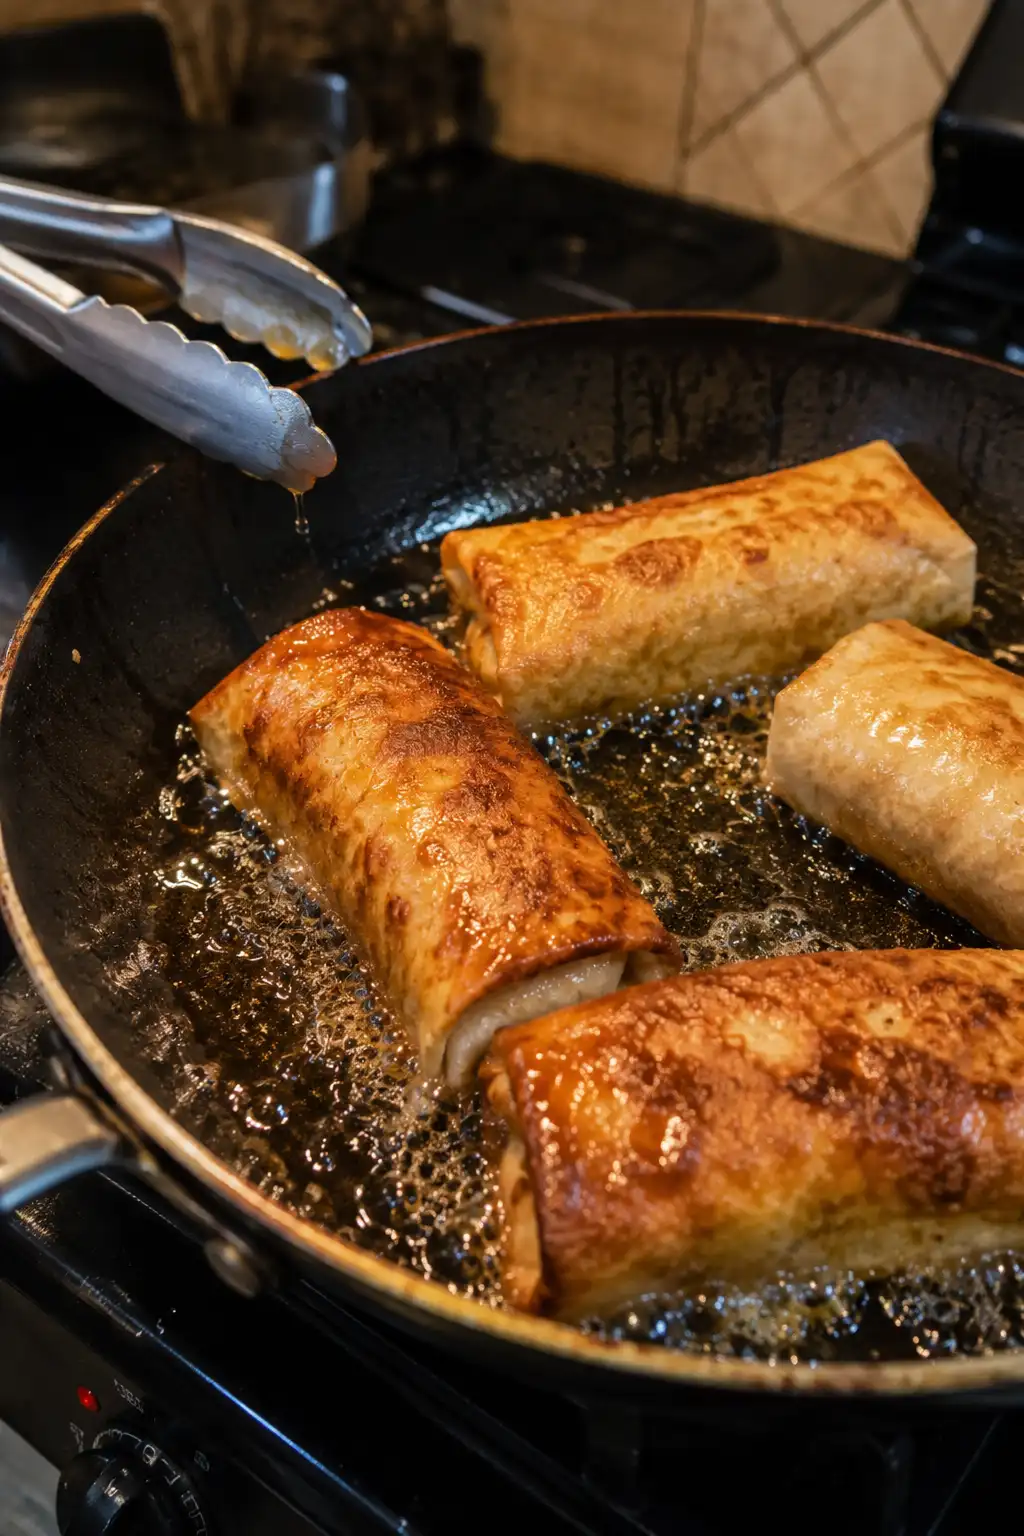
For the oven method, preheat to four hundred degrees Fahrenheit, place the chimichangas seam side down on a baking sheet, brush lightly with oil, and bake for eighteen to twenty minutes, flipping once, until golden and crisp. For the skillet method, heat two to three tablespoons of oil over medium heat and cook the chimichangas seam side down for two to three minutes per side, until deeply golden and crisp.
Step Four Rest and Serve
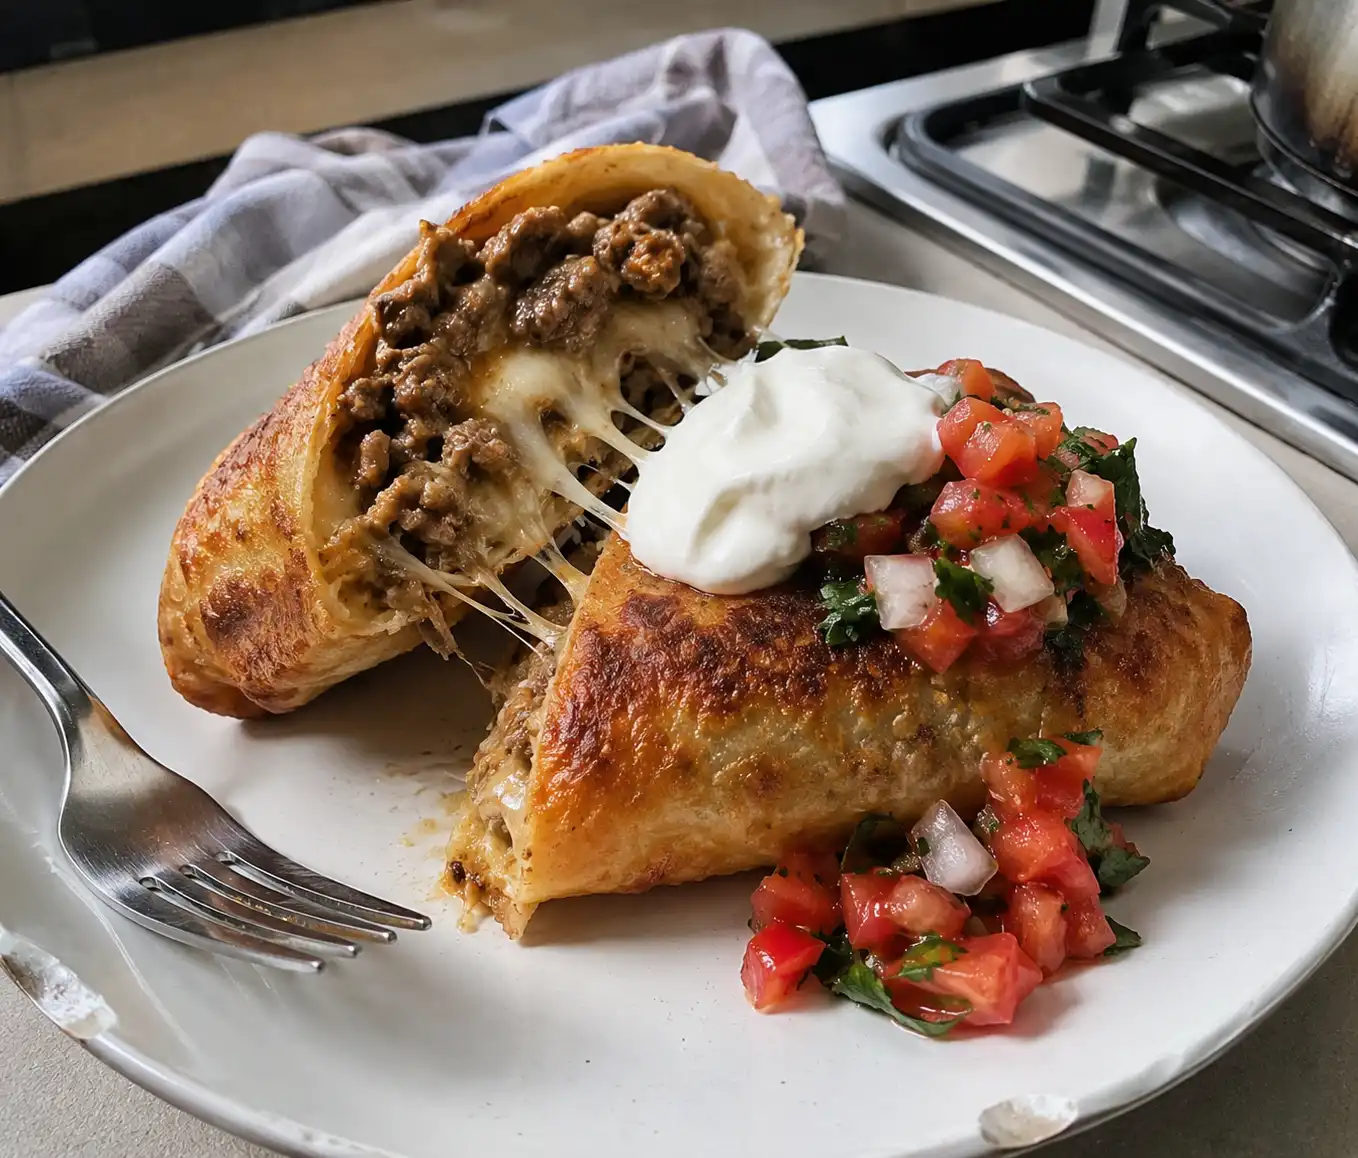
Let the chimichangas rest for two minutes before serving, then top with your favorite garnishes like sour cream, guacamole, shredded lettuce, or fresh salsa.
Frying or Baking, Which Should You Choose
Both methods produce genuinely delicious results, so the right choice really comes down to what you are in the mood for. Frying delivers that classic, deeply crispy shell most people associate with restaurant style chimichangas, with a slightly richer overall bite. Baking trades a small amount of that crunch for a noticeably lighter dish, using far less oil while still crisping the tortilla nicely, especially if you flip them halfway through and brush on a bit more oil or melted butter before that final stretch in the oven.
Also Read: Crispy Beef and Cabbage Stir Fry Recipe – Quick & Flavorful Dinner
What Sets a Chimichanga Apart From a Burrito
At first glance, chimichangas and burritos look nearly identical, both built around a filled, rolled tortilla. The real difference comes down to what happens after they are rolled. A burrito stays soft, typically served warm or lightly grilled, while a chimichanga gets a proper crisping, whether fried or baked, transforming the outer tortilla into a genuinely crunchy shell. That textural contrast between the crisp exterior and the warm, cheesy filling inside is exactly what makes chimichangas feel like a different dish entirely, even though the building blocks are so similar.
Delicious Variations to Try
This recipe is easy to customize based on what your family loves. Stirring extra refried beans into the filling adds even more creaminess, while diced jalapenos or a swap to pepper jack cheese brings noticeable heat for anyone who likes things spicy. For a fun breakfast twist, swap the beef for scrambled eggs, crumbled bacon, and cheese. A vegetarian version comes together easily too, simply replace the beef with sauteed vegetables and black beans for a filling that is just as satisfying.
For an extra indulgent finish, top baked chimichangas with warm queso, enchilada sauce, or salsa verde for a smothered style presentation that turns this into an even heartier meal.
Tips for the Crispiest Chimichangas
A few small details make a real difference here. Warming the tortillas slightly before rolling keeps them flexible and helps prevent any cracking along the folds. If you are frying, make sure your oil is fully heated to three hundred fifty degrees Fahrenheit before adding the chimichangas, since oil that is too cool will leave you with a greasy, soggy shell instead of a crisp one.
Always place the chimichangas seam side down first, whether frying or baking, since this helps seal the roll shut as it cooks. If you are worried about them coming undone, securing the seam with a toothpick before cooking adds extra insurance, just remember to remove it before serving.
Beef and Cheese Chimichangas
Ingredients
Equipment
Method
- Cook the Beef Filling – In a large skillet over medium heat, cook ground beef and diced onion until meat is browned and onion is tender. Drain excess grease. Stir in garlic, taco seasoning, and salsa. Simmer 3 to 4 minutes until well combined.
- Assemble the Chimichangas – Spread a spoonful of refried beans down the center of each tortilla. Top with a generous scoop of the beef mixture and a handful of shredded cheese. Fold in the sides and roll up tightly like a burrito.
- Cook the Chimichangas – Oven method: Preheat oven to 400 degrees Fahrenheit. Place chimichangas seam side down on a baking sheet. Brush lightly with oil and bake 18 to 20 minutes, flipping once, until golden and crispy. Skillet method: Heat 2 to 3 tablespoons of oil in a skillet over medium heat. Place chimichangas seam side down and cook 2 to 3 minutes per side until golden and crisp.
- Serve – Remove from heat and let rest 2 minutes before serving. Add toppings such as sour cream, guacamole, lettuce, or salsa if desired.
Notes
Make Ahead and Storage Tips
These chimichangas are wonderfully convenient for meal prep. Assembled chimichangas can be wrapped tightly in plastic wrap or foil and refrigerated for up to two days before cooking, making them a great option to prep ahead of a busy week.
For longer storage, arrange assembled, uncooked chimichangas in a single layer on a baking sheet and freeze until solid, then transfer to a freezer bag for up to two months. Cook directly from frozen, simply adding a few extra minutes to whichever cooking method you choose.
Leftovers that have already been cooked keep in an airtight container in the refrigerator for up to three days. When reheating, avoid the microwave, since it tends to soften the crispy tortilla shell. An oven or air fryer works far better for bringing back that crunch.
Frequently Asked Questions
Can I use chicken or pork instead of beef
Yes, shredded chicken, ground turkey, or pulled pork all work wonderfully as substitutes, giving you an easy way to switch up this recipe based on what you have on hand.
How do I keep the chimichangas from opening while frying
Rolling them tightly and placing them seam side down first in the hot oil goes a long way toward keeping them sealed. If you want extra insurance, a toothpick through the seam works well too, just remember to remove it before serving.
Can I make these chimichangas healthier
Yes, baking instead of frying, along with using lean ground beef, whole wheat tortillas, and reduced fat cheese, are all easy swaps that lighten up this recipe without sacrificing much flavor.
What toppings work best with chimichangas
Sour cream, guacamole, shredded lettuce, and fresh pico de gallo are all classic choices, and a drizzle of queso or enchilada sauce turns this into an even more indulgent smothered version.
Final Thoughts
These beef and cheese chimichangas prove that a genuinely crispy, restaurant style dinner is well within reach on a regular weeknight. With a short list of pantry ingredients, a flexible cooking method, and endless room for customization, this is the kind of recipe that earns a permanent spot in the family dinner rotation. Whether you fry them for that classic crunch or bake them for something a little lighter, one bite is all it takes to see why chimichangas have stuck around as a Tex-Mex favorite for so long.